At this stage you have acquired a new customer and you are now ready to create a sales offer that fulfills the needs of this customer. Today customers want options to personalize products, so you must be able to enrich the product offering constantly and deliver the best customer experience. Thanks to VariSales Basic, this is simple!
In VariSales, the configurable offering is defined so that the company’s product data and offering model is shared across all departments from the same source of data using a common language. You can quickly make changes and customize the offer as you need.
Once you have collected all of the customer’s requirements, you need to create a quote for the product. Note: Before you create any offer, you need to make sure the customer is already created in the system.
Let’s learn how to create a sales offer by defining the customer, setting discounts, completing the attributes, adding the products, and completing the offer options. In VariSales Basic you can create a sales offer in 6 easy steps!Read further to see how it’s done!
How to Create a Sales Offer in VariSales Basic
Step 1. Define the Customer
In the “Offers” tab, select the “Create New” menu and click on “Create” to start creating a new offer.
Next, select a customer:
• Click on “Select customer for offer”.
• You can either create a new customer or select an existing one.
• From the list, choose the customer by clicking on “Select”.
Note: If you need to, you can change the customer by clicking on “Change customer for offer”.
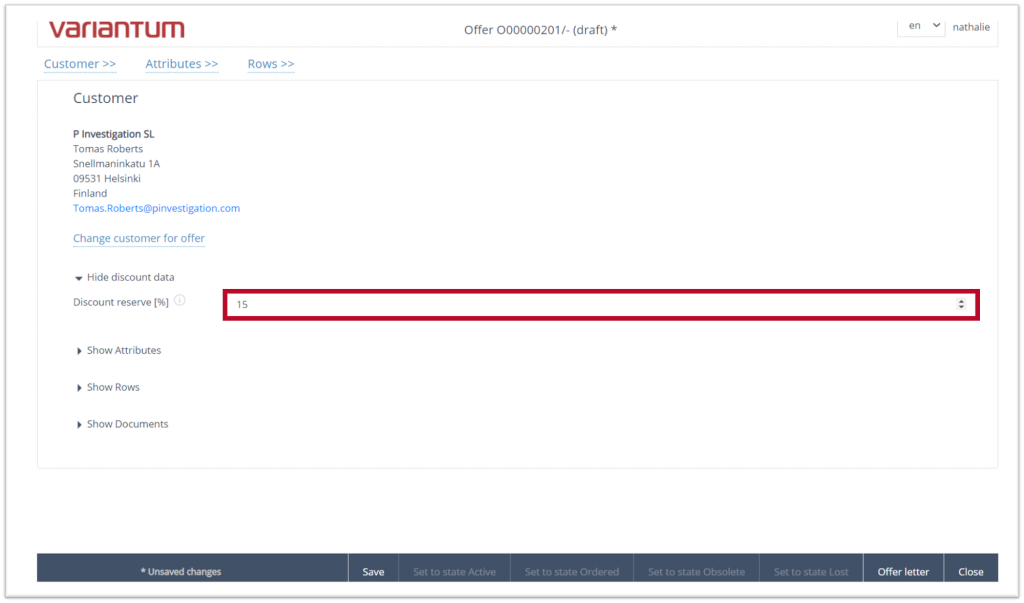
Step 2. Set the Discount Data
If you want to offer the customer any discount, you can select the discount percentage from the menu.
The system allows you to set a discount limit and to configure which roles are able to edit the discount limit.
Note: If you exceed the discount limit you will get a warning on the system.
Step 3. Complete the Attributes
In this section you will find general attributes related to the offer, dates, payment terms, transportation specification, and other general information that is not specific to the product.
You can add texts at the beginning and at the end of the offer letter.
Complete the form with the required information.
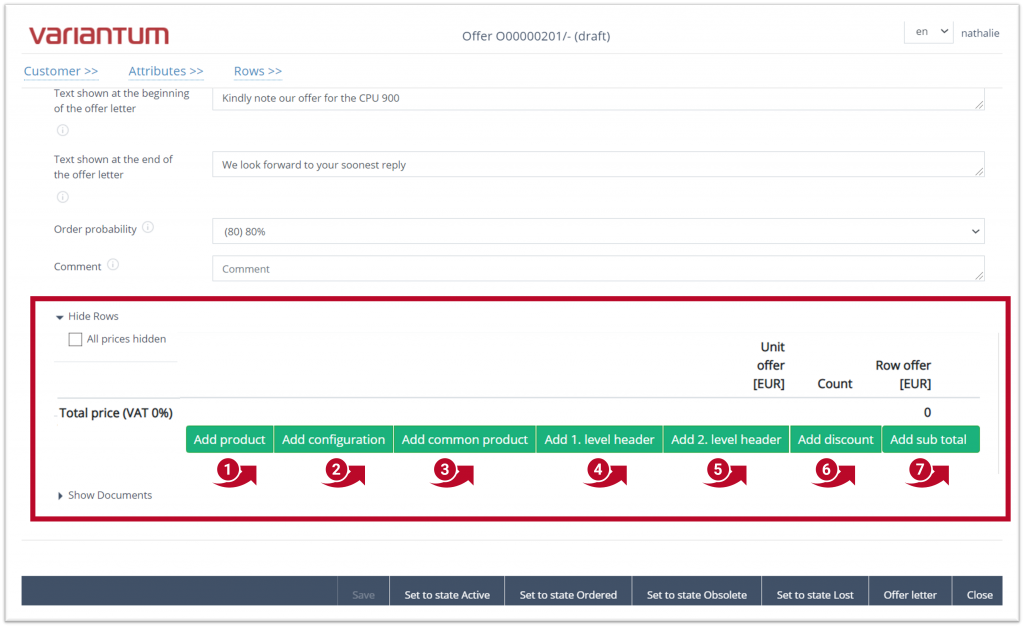
Step 4. Add Products
In this section, you will select the product and product-specific characteristics. As you can see in the image below, these are as follows:
“Add product” – You can select non-configurable products from the database.
“Add configuration” – You can include all the possible configurations to a configurable product.
“Add common product” – Use this function to add any product you need to quote that is not predefined in the system, for example, if you need to quote a freight service.
“Add 1. level header” – This allows you to include a header before the products. It can be moved in the structure up or down as well.
“Add 2. level header” – This function allows you to include another set of products under a different header.
“Add discount” – You can add a discount to the offer.
“Add sub total”– You can add the subtotal to the offer.
Step 5. Add Documents
You can add additional documents to the offer.
Click on the box to locate your document in your local browser and upload it, or just drag and drop your document into the system.
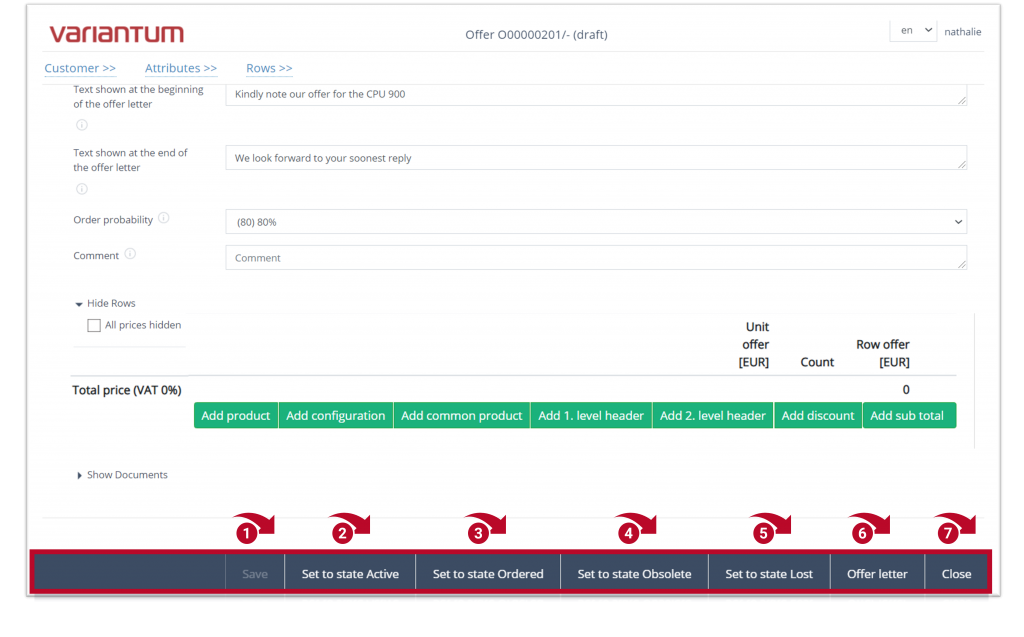
Step 6. Complete the Offer
In the bottom bar you will find other options to manage the offer:
“Save” –Click on “Save” once you’ve finished completing the offer. The offer will be saved as a draft.
“Set to State Active” – Once you send the offer to the customer you can set the offer as “Active”. To find the offer after, locate it under the “Active” offers section.
“Set to State Ordered” – If the offer is accepted by the customer and an order is placed, you can set the offer as “Ordered”.
“Set to State Obsolete” –When an offer has expired, you can set the offer as “Obsolete” to keep track of the offers you’ve given to customers.
“Set to State Lost” –When an offer is not accepted by the customer, you can set the offer as “Lost”.
“Offer Letter” – This button allows you to preview and manage the offer before you send it to the customer.
“Close” – Click on “Close” to go back to the homepage.